
Table of Contents
- What You'll Need Before You Press DTF Transfers
- Preparing Your Garment Blank for Application
- DTF Heat Press Temperature and Time Settings
- How to Press DTF Transfers: The Full Application Steps
- Hot Peel vs Cold Peel DTF Transfers: Which Do You Have?
- Post-Press Care: Washing and Storage for Lasting Durability
- Troubleshooting DTF Application Issues
- Conclusion
Last Updated: August 30, 2026
Getting a DTF transfer to look crisp, vibrant, and wash-durable depends on proper application technique. This guide covers exactly how to press DTF transfers correctly, from garment prep through post-press care, so you get consistent, professional results every time.
What You'll Need Before You Press DTF Transfers
DTF transfer application requires a short list of essential tools:
- Heat press machine (clamshell or swing-away)
- DTF transfers (your printed gang sheet, cut to size)
- Teflon sheet or parchment paper
- Pressing pillow or foam pad (for seams and pockets)
- Heat-resistant tape (optional, for positioning)
- A lint roller or lint brush
- Thermometer or temperature calibration tool
The Teflon sheet protects the transfer surface during pressing and prevents adhesion to the upper platen. A pressing pillow is essential when pressing near seams, zippers, or pockets, because uneven surfaces create pressure dead zones that cause partial adhesion failures.
Temperature calibration matters: heat press platens often run 15-20 degrees hotter or cooler than their digital display shows (peer-reviewed research). An infrared thermometer lets you verify actual platen temperature before committing to a production run.
Preparing Your Garment Blank for Application
Pre-Pressing to Remove Moisture and Wrinkles
Pre-pressing is the step that separates consistent results from inconsistent ones. Fabric holds ambient moisture, especially natural fibers like cotton, and that moisture turns to steam during the press cycle, disrupting adhesion.
Pre-press the garment for 3-5 seconds at your target press temperature with the platen closed, no transfer in place. This removes moisture and flattens wrinkles simultaneously. Wrinkles create pressure gaps that become bubbles or lifting edges after washing.
Let the garment cool for 10-15 seconds after pre-pressing. Pressing a DTF transfer onto a super-hot garment can cause the adhesive to activate too quickly and bond inconsistently.
Positioning the Transfer on the Platen
Position matters because the transfer film is opaque until peeled. For chest prints, standard placement is 3-4 inches below the collar seam, centered horizontally. For left-chest logos, align the left edge roughly over the pocket area.
Place the transfer ink-side down against the garment, with the carrier film facing up toward the platen. Use heat-resistant tape at the corners if the transfer tends to shift during press closure.
DTF Heat Press Temperature and Time Settings
The standard recommended range for pressing DTF transfers is 275°F to 320°F (135°C to 160°C) for 10-15 seconds at medium-to-firm pressure (peer-reviewed research). Most standard cotton and polyester blends press well at 300°F for 12-15 seconds.
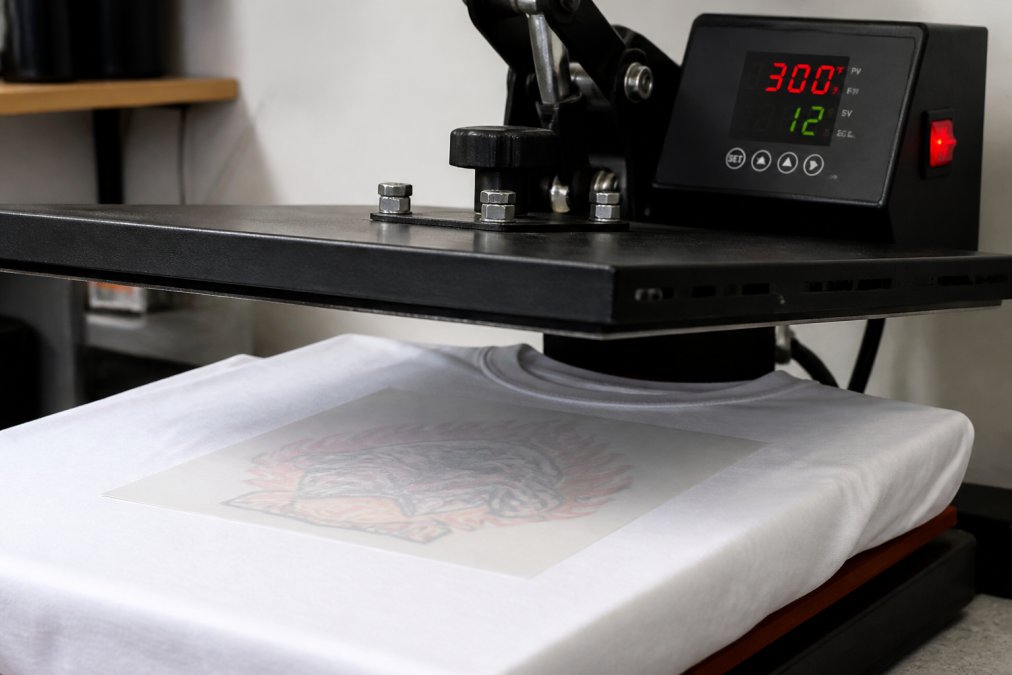
Dwell time directly affects how thoroughly the polymer powder melts and bonds to the fabric fibers. Too short and adhesion is incomplete. Too long and you risk scorching the fabric or creating a stiff print that cracks prematurely.
Verify actual platen temperature with an infrared thermometer before adjusting settings based on results.
Pressure Settings by Fabric Type
| Fabric Type | Temperature | Dwell Time | Pressure |
|---|---|---|---|
| 100% Cotton | 300-315°F | 12-15 sec | Medium-firm |
| 50/50 Cotton-Poly | 290-305°F | 10-12 sec | Medium |
| 100% Polyester | 270-290°F | 10-12 sec | Medium-light |
| Performance/Moisture-Wicking | 265-280°F | 8-10 sec | Light-medium |
| Nylon | 250-265°F | 8-10 sec | Light |
| Canvas/Heavy Duck | 310-320°F | 15-18 sec | Firm |
Polyester and performance fabrics are heat-sensitive. High temperatures cause dye migration, where the fabric's dye bleeds into the transfer and discolors the print. Lower temperatures and shorter dwell times reduce this risk.
How to Press DTF Transfers: The Full Application Steps
- Preheat your heat press to the target temperature for your fabric type. Verify with a thermometer.
- Lint roll the garment to remove dust and debris.
- Pre-press the garment for 3-5 seconds to remove moisture and wrinkles. Let it cool 10-15 seconds.
- Position the garment on the platen, smooth and flat. Use a pressing pillow under seams if needed.
- Place the transfer ink-side down on the garment in your desired position.
- Cover with a Teflon sheet to protect the transfer surface.
- Close the heat press and apply pressure for the recommended dwell time.
- Open the press and remove the Teflon sheet.
- Peel the carrier film according to whether your transfer is hot peel or cold peel.
- Perform a second press (optional): place the Teflon sheet over the finished transfer, press for 5-8 seconds at the same temperature. This improves durability and creates a softer hand feel.
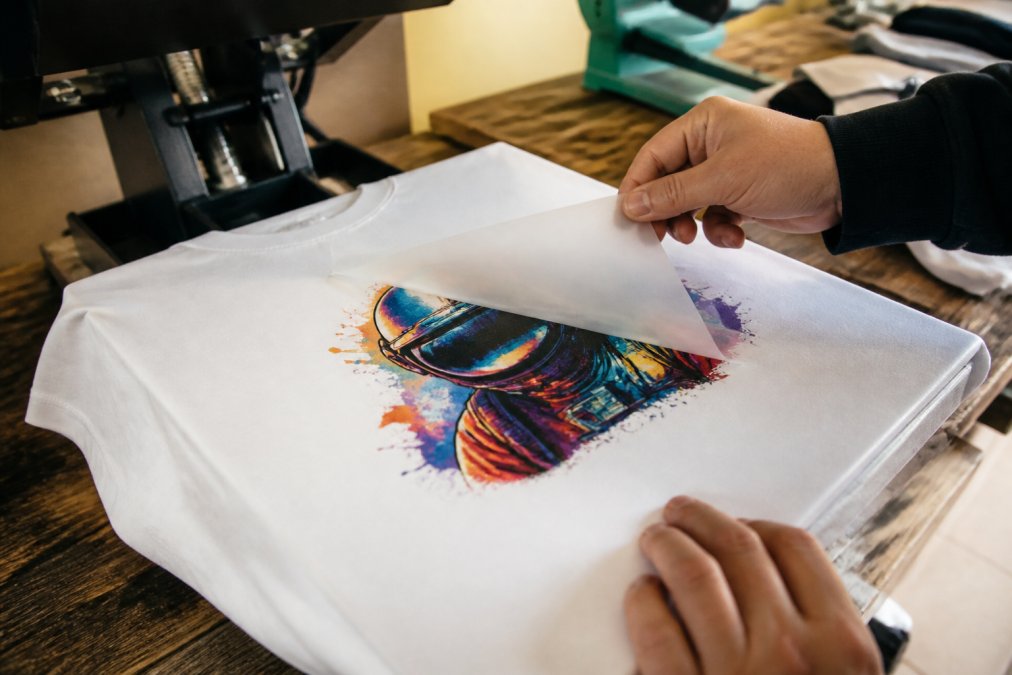
Hot Peel vs Cold Peel DTF Transfers: Which Do You Have?
Hot peel transfers are designed to have their carrier film removed immediately after pressing, while the transfer is still warm. Peeling too slowly or waiting until cool can cause the film to re-bond and pull the print off the garment.
Cold peel transfers require the garment to cool to room temperature before peeling. Peeling while warm disrupts curing and causes the ink layer to lift or smear.
Most DTF transfers are cold peel by default. Check your product specifications. If unsure, default to cold peel: wait 30-60 seconds after pressing, then peel slowly from one corner at a low angle, pulling the film back on itself rather than pulling upward.
Peel angle matters regardless of type. Pulling straight up creates a tearing force that can lift design edges. Peeling at a low, consistent angle parallel to the garment surface produces a cleaner release.
Build Your Rolling Gang Sheet →
Post-Press Care: Washing and Storage for Lasting Durability
A properly pressed DTF transfer should survive 50 or more wash cycles without cracking, fading, or peeling.
Washing instructions for DTF-decorated garments:
- Wait at least 24 hours after pressing before the first wash
- Turn garments inside out before washing
- Use cold or warm water (below 105°F); avoid hot water cycles
- Use a gentle or normal cycle; avoid heavy-duty settings
- Do not use bleach or fabric softener on the print area
- Tumble dry on low heat or hang dry; avoid high-heat dryer cycles
High heat in the dryer is the most common cause of premature DTF print failure. The adhesive can re-activate and re-cure in a distorted state, causing cracking and edge lifting.
Storage of unPressed DTF Transfers:
Keep transfers flat, away from direct sunlight, and in a cool, dry environment. Heat and humidity degrade the polymer powder layer over time, reducing adhesion before pressing. Store transfers in sealed plastic sleeves with a silica gel packet to control moisture. Transfers stored correctly typically remain viable for several months to over a year.
Troubleshooting DTF Application Issues
Most DTF application problems trace back to temperature, pressure, dwell time, or garment preparation.
Visual Failure Analysis: What Went Wrong and How to Fix It
Print is peeling at the edges after washing: Insufficient pressure during pressing, particularly at transfer edges. Re-press with firm pressure and a full Teflon sheet. If the problem persists, check whether your platen is level and applying even pressure.
Print has a rough, textured feel and looks dull: Under-curing. Increase dwell time by 2-3 seconds and verify your actual platen temperature. A second press often rescues an under-cured transfer if caught early.
Colors appear washed out or discolored (especially on polyester): Dye migration. Lower your temperature and reduce dwell time. For performance fabrics, use a dye-blocking transfer if this is recurring.
Carrier film tears during peeling, leaving residue on the print: The transfer was peeled at too steep an angle, or the film was too cold for a hot-peel transfer. For cold-peel transfers, ensure the garment has cooled fully. For hot-peel transfers, peel immediately after pressing.
Print looks perfect but cracks after 3-5 washes: The garment was washed in hot water or dried on high heat, or the transfer was stored improperly and the adhesive was degraded. Check wash care instructions and verify your transfer storage conditions.
Bubbling or lifting in the center of a large print: A seam or pocket under the transfer creates uneven pressure. Use a pressing pillow under the problem area to level the substrate.
Pressing DTF transfers consistently requires attention to temperature calibration, proper garment prep, correct peel technique, and post-press care. These variables compound quickly when ignored. Rapid Fire DTF gang sheets are built for exactly this workflow, with vivid color output and 50+ wash durability rated for properly applied prints. Build your custom rolling gang sheet and see the difference quality transfers make in your finished results.
Frequently Asked Questions
Q: What heat press settings should I use for DTF transfers?
A: Most DTF transfers apply best at 300-320°F (149-160°C) with medium-to-firm pressure for 10-15 seconds. Exact settings depend on the fabric: thinner substrates like tri-blends need the lower end of that range, while standard 100% cotton can handle the higher end. Always do a test press on a scrap piece of the same fabric before running a full production batch, and verify your heat press is temperature-calibrated with a laser thermometer.
Q: What is the difference between a hot peel and a cold peel DTF transfer?
A: Hot peel DTF transfers let you pull the transfer film immediately after pressing while the garment is still hot, saving production time. Cold peel transfers require you to let the garment cool to room temperature first, usually 30-60 seconds, before removing the film. Peeling a cold peel transfer while it is still hot causes the design to lift or crack. Check your transfer supplier's spec sheet to confirm which type you have before pressing your first piece.
Q: How do you prevent DTF transfers from cracking after washing?
A: Cracking after washing almost always traces back to insufficient dwell time, low pressure, or skipping the second press. Make sure you're pressing at the correct temperature for the full 10-15 seconds with firm pressure. A second press with a Teflon sheet or parchment paper for 5 seconds after peeling improves adhesion significantly. For care, wash garments inside-out in cold water and avoid high-heat dryer cycles, which degrade the polymer powder bond over time.
Q: Do you need parchment paper or a Teflon sheet when pressing DTF transfers?
A: Yes. Placing a Teflon sheet or parchment paper over the transfer during the second press protects the design surface from direct platen contact and prevents scorching. During the initial press, the transfer film itself acts as the barrier, so a cover sheet is optional but still recommended. For the second press, done after peeling to set the soft hand feel and improve durability, a cover sheet is essential. Teflon sheets are reusable and the more cost-effective long-term option.
This article was written using GrandRanker